In our last post we talked about what Ansible is, how it can help us with our SysAdmin duties (both in the enterprise and in our HomeLab), and in today’s post we are going to talk about the continued set up and creating our first Playbooks.
Yesterday we tested out our Ansible file by creating a dedicated project folder (called “Playbooks”) where we stored our “hosts” files. For testing out new hosts, or separating projects this would be a good practice, however since this is a Homelab and I won’t have to separate out my projects or hosts into a logical folder structure (such as for major enterprises/infrastructure setups):

Let’s put our hosts in the default location (for Ansible), located at /etc/ansible/hosts. In Debian we have to manually create this folder:
$ sudo mkdir /etc/ansible
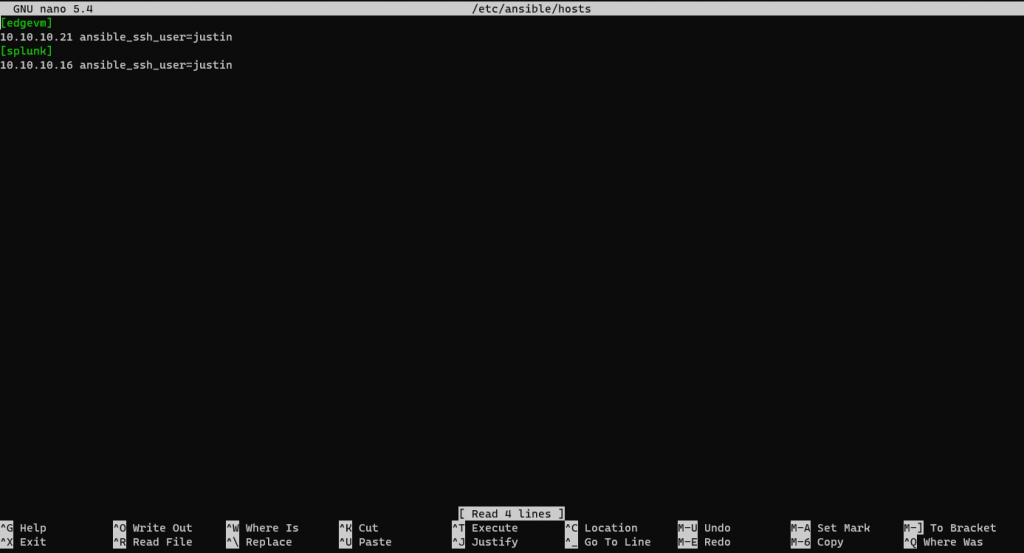
$ sudo nano /etc/ansible/hosts
Then we copy over the contents of our hosts file:
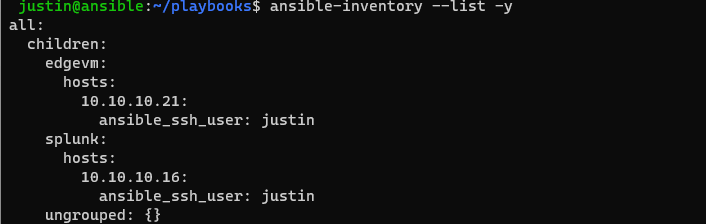
Now we can verify that Ansible is in fact reading this host file by default by running the command:
$ ansible-inventory --list -y
Which should produce this output:
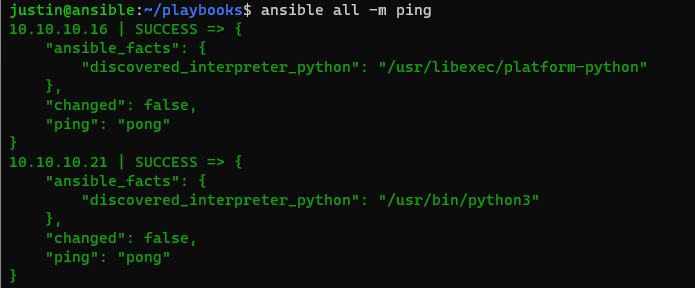
Then we can rerun our ping test again, this time we don’t call out our hosts file in our “playbooks” folder
$ ansible all -m ping

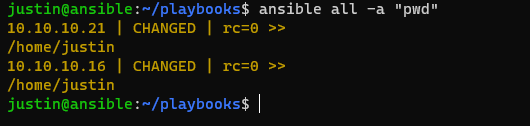
Pretty cool right? Now you can run more than just “ping” which is a built in Ansible Command. You can run ad-hoc commands directly to the servers. Let’s try one (using “-a”). The bash command “pwd” will print the users default working directory, as if it just SSH’d into their environment:
$ ansible all -a "pwd"
Or another command
$ ansible all -a "df -h"

Remember in our Hosts file I had two blocks (one named “edgvm” and one named “splunk”).
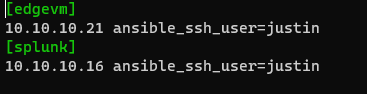
You can call these separately as well using Ansible Commands and it will only use commands in that particular group, lets try it:
$ ansible edgevm -a "df -h"
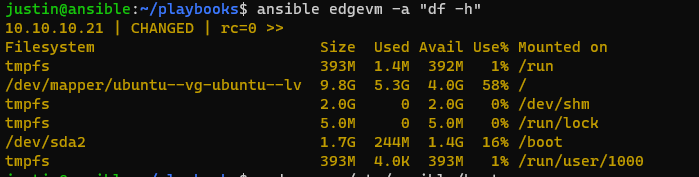
So why is this important that I am separating these two virtual machines in their own “blocks”? Simple, one is running Ubuntu and one is running RedHat Enterprise Linux, and if I was to try to run Ubuntu specific commands on RedHat I would get errors, and vice versa (such as apt-get update, or dnf update).
Onto our first Playbook. Let’s create our Playbook in /etc/ansible:
$ cd /etc/ansible
$ sudo touch playbook.yaml
$ sudo nano playbook.yaml

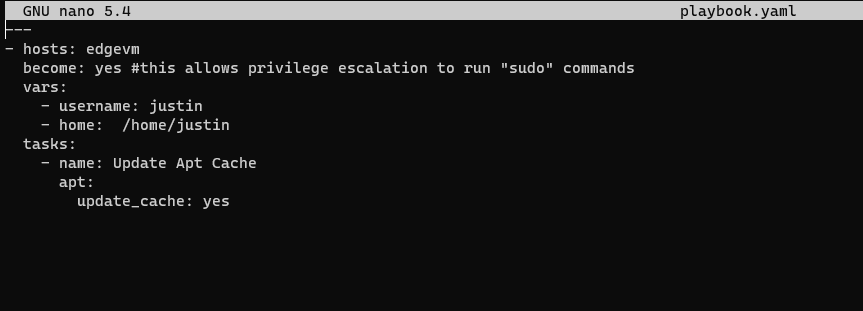
Next let’s set up out “barebones” for our playbook:
---
- hosts: all #we are calling all hosts here
  vars:
    - username: justin #Optional - it's in /etc/ansible/hosts
    - home:  /home/justin
  tasks:
    - name:
These should all be pretty self-explanatory. Let’s create a playbook that updates my Ubuntu virtual machines Apt Cache:
And let’s run the playbook, so while in the same directory (/etc/ansible).
$ ansible-playbook playbook.yaml --ask-become-pass
Let’s break down these commands
ansible-playbook : this is the initial command to run playbooks playbook.yaml : this is the playbook file we just created –ask-become-pass : This will prompt us for a become (su or root) password. This is so that we are not storing these in plain-texts

And just like that we have created our first playbook, using pre-defined Ansible Commands (apt) in a playbook to update our apt cache for one of our VM’s.
Ansible provides a multitude of ways for System Admins to create playbooks to altar, change, define, and customize/control their infrastructure and environment and even launch their infrastructure as a code to develop highly available, very flexible environments, cutting down on tasks that would normally take hours/days to complete in no time.