Preface:
In the spirit of Homelab, it’s always best to over-engineer, over-architect, “over-do” anything you do. But sometimes it can be problematic if you go too far and forget to shut the door behind you and leave an open gap, forget to update to the latest security patches, etc. While it’s not always the case that your machines become susceptable and used maliciously (for example, in a bot-net), reducing your attack surface overall is always good practice. Plus if you are in cybersecurity, its always good to freshen up your skills, learn how to harden systems to certain benchmarks (CIS, FIPS, NIST, etc) and if you really want to dig deeper, understand why your system breaks and how to fix them when you apply a benchmark that is meant to secure your system but then you lose the capability to perform that task you were used to doing (more on this later).
CIS Benchmarks
For this post, I will be using CIS (Center for Internet Security) benchmarks. You can also use DISA STIG’s (coupled with the SCC tool/Nessus for automated scanning) or other benchmarks that you want to deploy into your network. However I’m not trying to go too crazy, just basic system hardening.
So why should you learn CIS Benchmarks? Well if you are cybersecurity oriented, and deal with most of the major compliance frameworks, you will see that a lot of these frameworks reference the CIS Benchmarks (such as CMMC, HIPPA, PCI-DSS) either directly or indirectly. The developers of the CIS Benchmarks are a group of volunteers who devote their time to providing best practices on how to harden operating systems to protect them, without going too crazy (such as air-gapping systems).
CIS Workbench
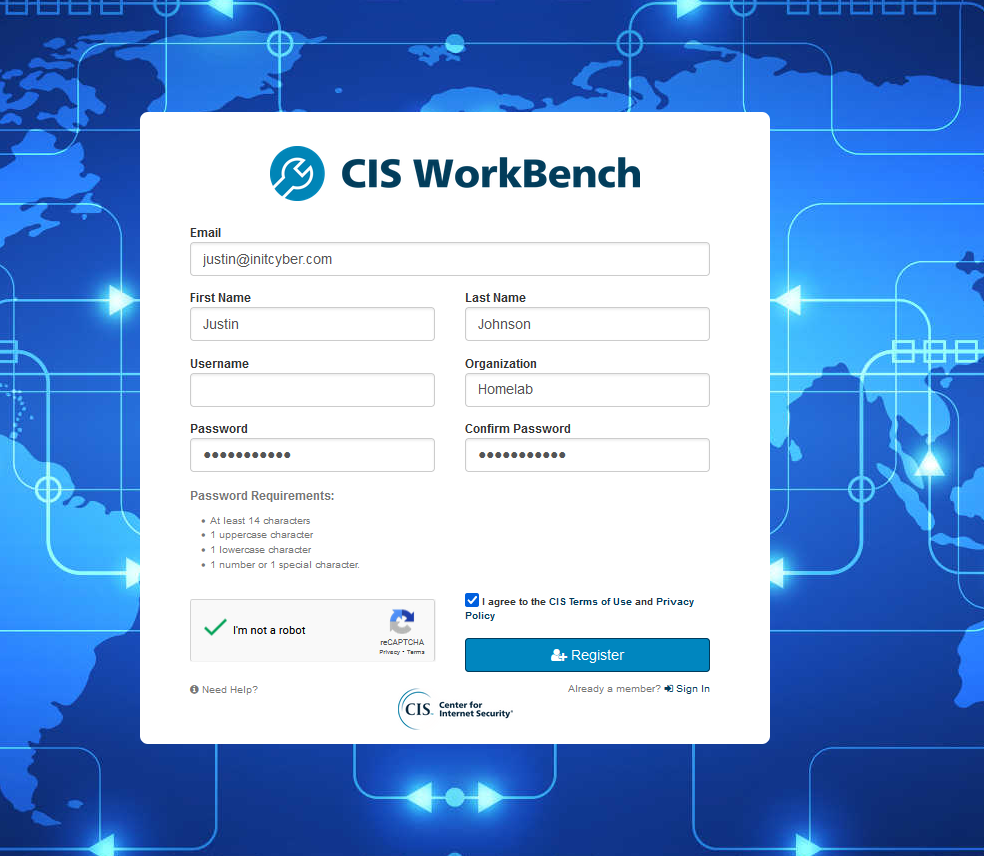
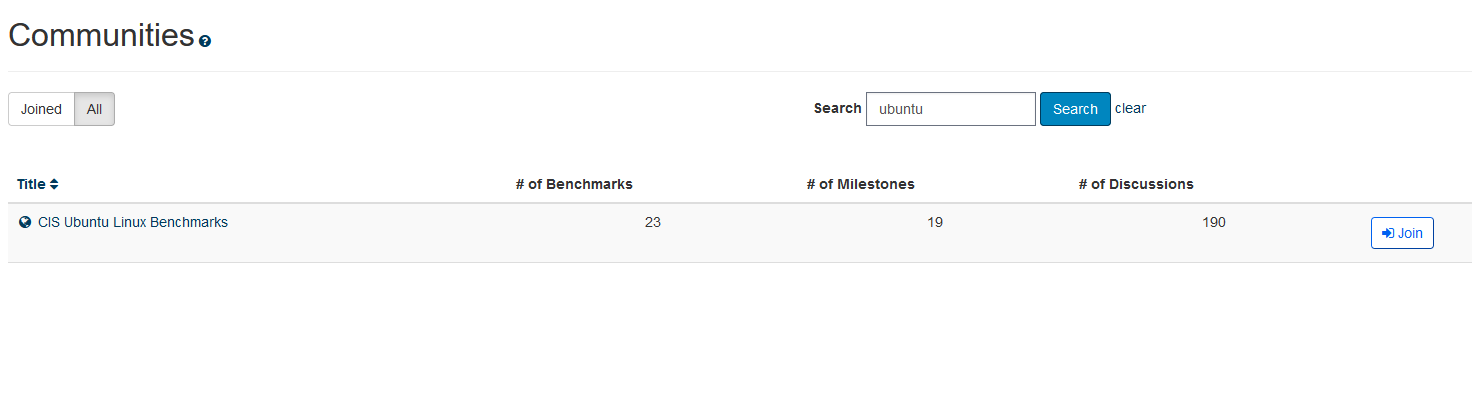
If you want to provide feedback on benchmarks and/or get insight to the CIS controls/benchmarks/updates as they happen, you will need to sign up for a CIS Workbench account at https://workbench.cisecurity.org/registration Then you will need to join a community.

Once you are logged in search for the community you want to join. This community is equivelant to the OS/device you are trying to harden, but also houses discussion groups, milestones, etc. Here you can view discussions, see the benchmarks, see open tickets, etc.
On the left side, you can find Benchmarks, discussion board, files, etc. You will find benchmarks currently in development as well as ones that are published.

Downloading Published Benchmarks without joining the Workbench
If you do not want to join the community or see insights and simply want to download the PDF Benchmarks you can at https://www.cisecurity.org/cis-benchmarks and click on “Access all benchmarks”. You will have to sign up and it will present you a download page where you can choose which OS/device you want to harden. These are the Published PDF’s vs whats currently in development.
For this one, I will pick up the Ubuntu PDF as that is currently what I am running primarily in my homelab aside from RHEL and Windows.
Great I have this PDF, what do I do with it?
OH MY GOSH ITS OVER 800 pages! What do I do! Well simple. Start reading. If you are cybersecurity minded, this is simply where you will need to start digging in deep and understanding how this all works.
There are two profiles in each of the CIS Benchmarks, Level 1 and Level 2.
Level 1 CIS Profiles are surface-level configuration recommendations which can be implemented rather quickly. Level 2 CIS Profiles start digging into the weeds, offering security in depth. These are often used for sytems that require tighter security controls. Frameworks such as HIPPA, NIST, and PCI-DSS will often have some overlap with CIS Level 2 Profiles. For Homelabs I do NOT recommend Level 2 CIS Benchmarks UNLESS THERE IS A SPECIFIC NEED. I say that very lightly, because some people may see a specific need to harden to CIS Level 2 profiles, such as servers exposed in DMZ’s, servers that have more exposure to sensitive information, have a bigger attack surface, etc. 90% of the time (I’m making a number up here) you will know if you need a CIS Level 2 profile within your homelab.
Please note, this is not a security recommendation by any means. While the chances of a nation state/bad actor actually hacking into your homelab is rather small (reward/effort ratio isn’t really there), the chance isn’t zero (0). Bot Nets still do exist, but basic hardening and keeping up with patching will usually remediate most known bot net attacks and other known malicious codes found today. Don’t be naive folks…
CIS-CAT Lite
So you have this 800+ page PDF for Ubuntu, and I read it, but where do I start? Luckily CIS provides a free tool to scan your systems calls CIS-CAT Lite. There is a pro version available which is more feature-rich (more reporting outputs, and more benchmark offerings than lite which only provides Windows 10, Chrome, and Ubuntu) but for a homelab, CIS-CAT Lite should be OK for most. CIS-CAT Pro requires a CIS Suite subscription (costly). The benefit of using CIS-CAT on your system first is to see where you fall in terms of compliance before you dive into going line by line on the PDF with each control…. You did read each of the controls and the entire PDF first right?
Download CIS-CAT Lite Here https://learn.cisecurity.org/cis-cat-lite
After you download it, extract it and run “Assessor-GUI” (assuming you are on a Windows-Based Machine)
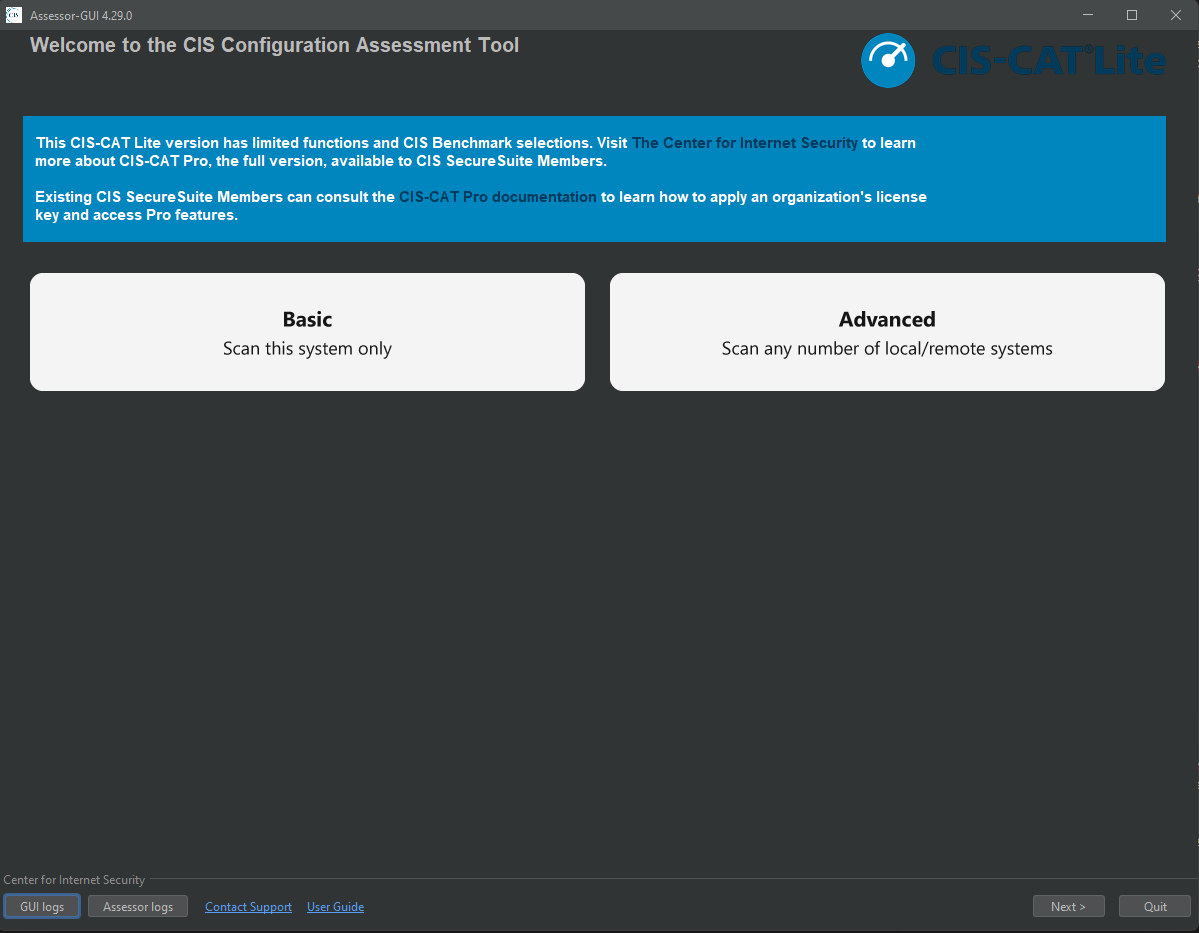
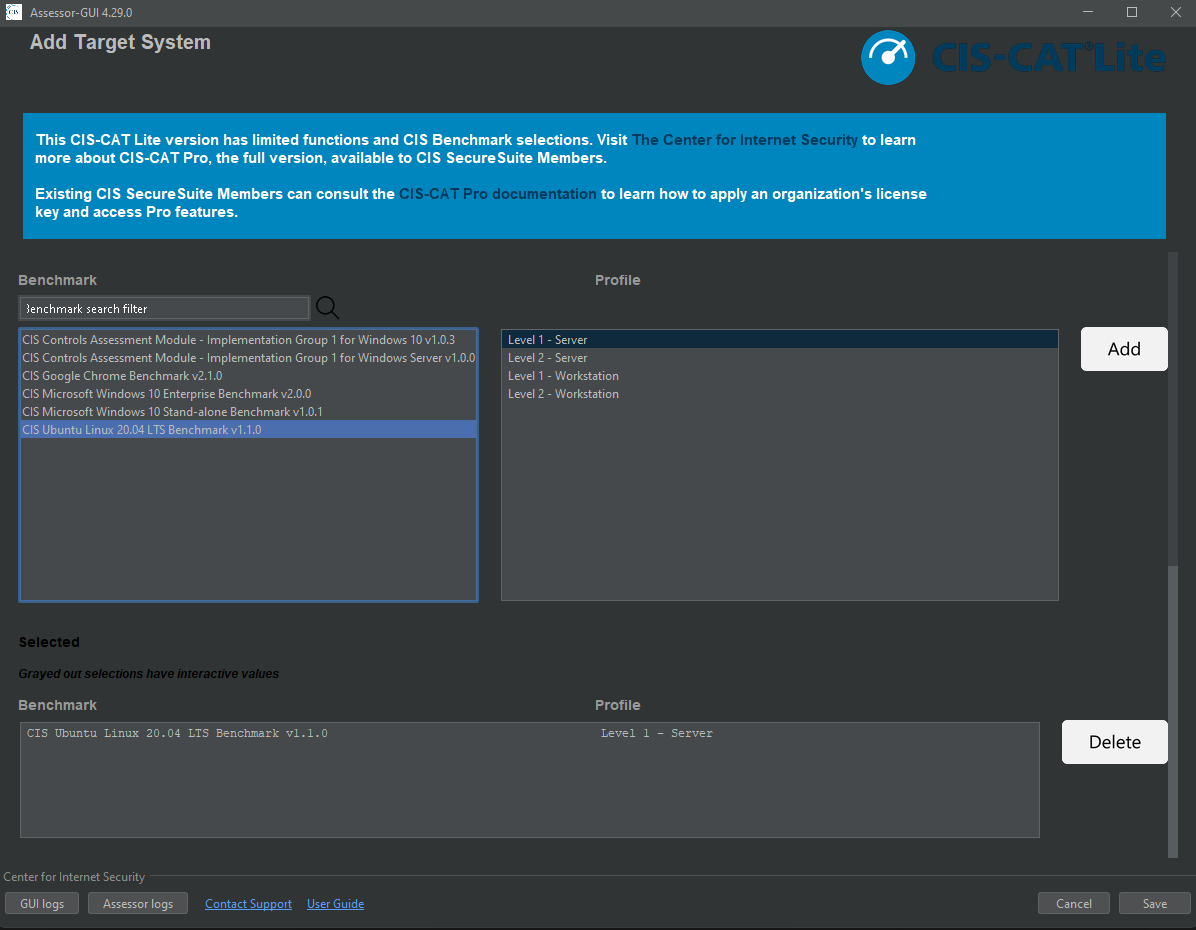
From here select “Advanced” as we are going to scan a remote target, then “Add remote or local target system”
Fill out all of the appropriate information, add your appropriate benchmark (in this case CIS Ubuntu Linux - Level 1 Server) then click “save”
From here you want to test the connection to the target to ensure that you can, in fact, access to box.
Then click next.
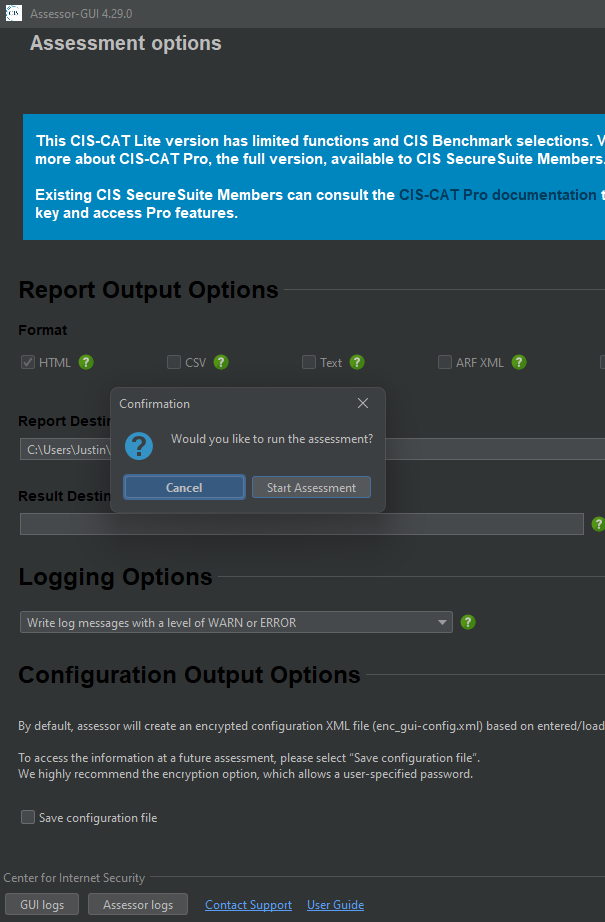
On the next screen select your destination folder for your HTML printout of benchmarks report. Remember where this output is so you can retrieve it later. Click “Next” and it will confirm that you want to run the assessment.
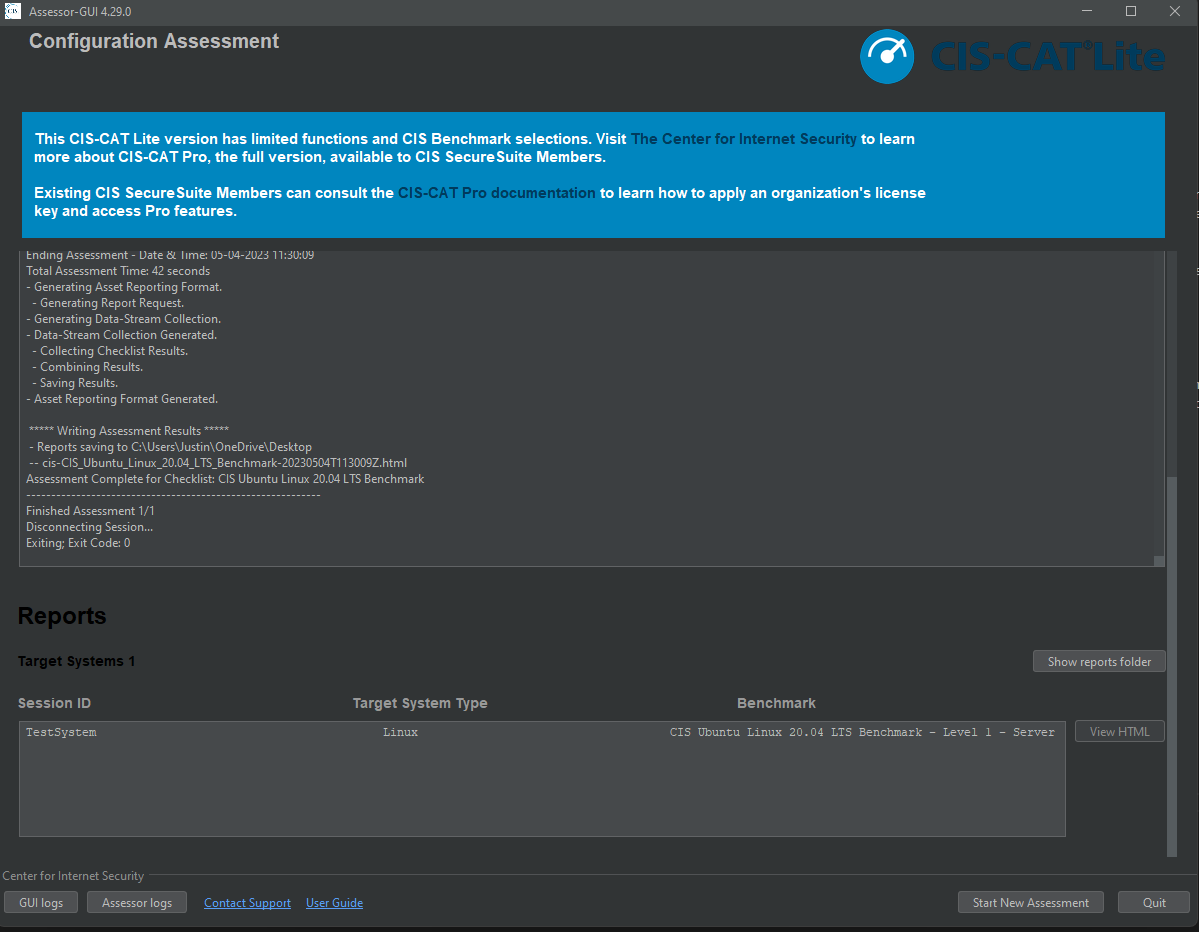
Give it a few moments (mine took less than 2 minutes) and it should be ready
CIS-CAT Results
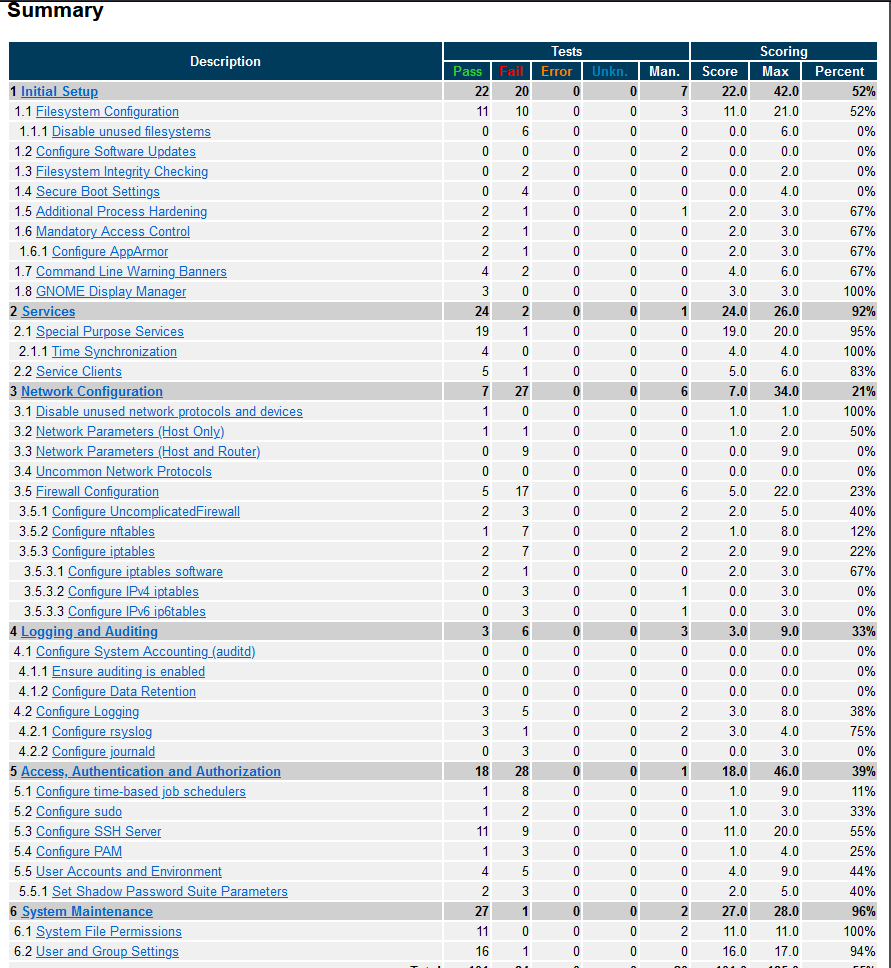
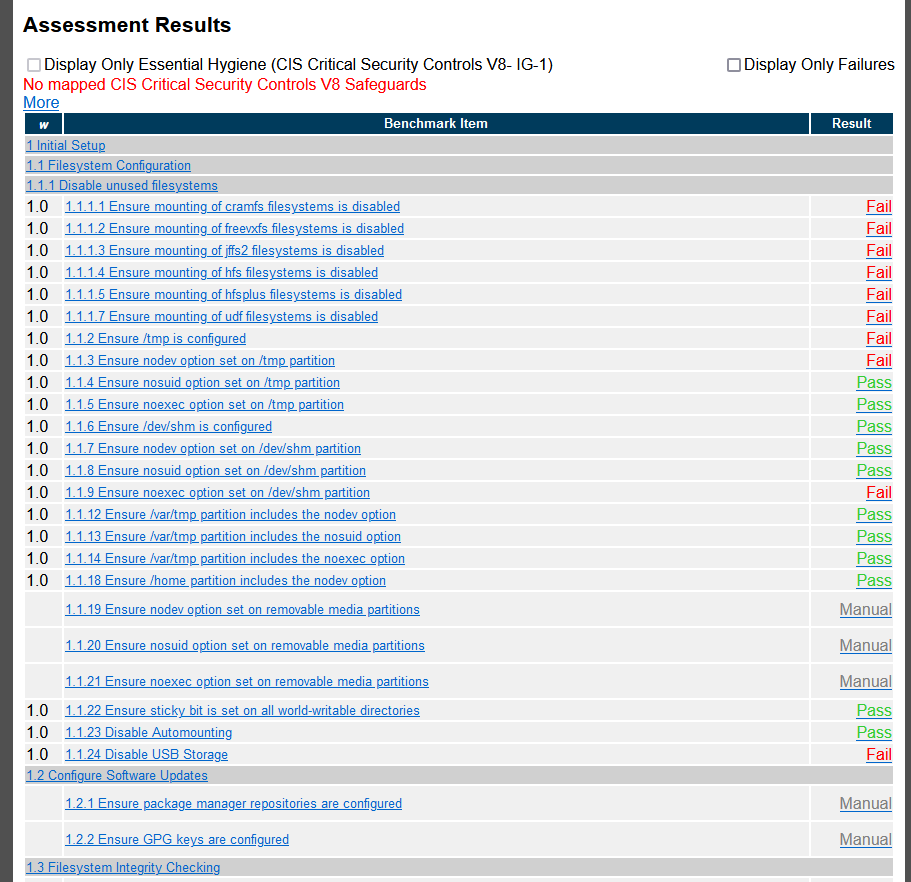
So here we can see the finalized results, both passed and failed. We can also filter down to “Display Only Failures” as well, which can help you determine what CIS controls need to be implemented on the system. If you click on each of the findings it will drill down further into the document and give you remediation steps on how to fix it. Lets try the first one, “1.1.1.1 - Ensure mounting of cramfs filesystems is disabled”
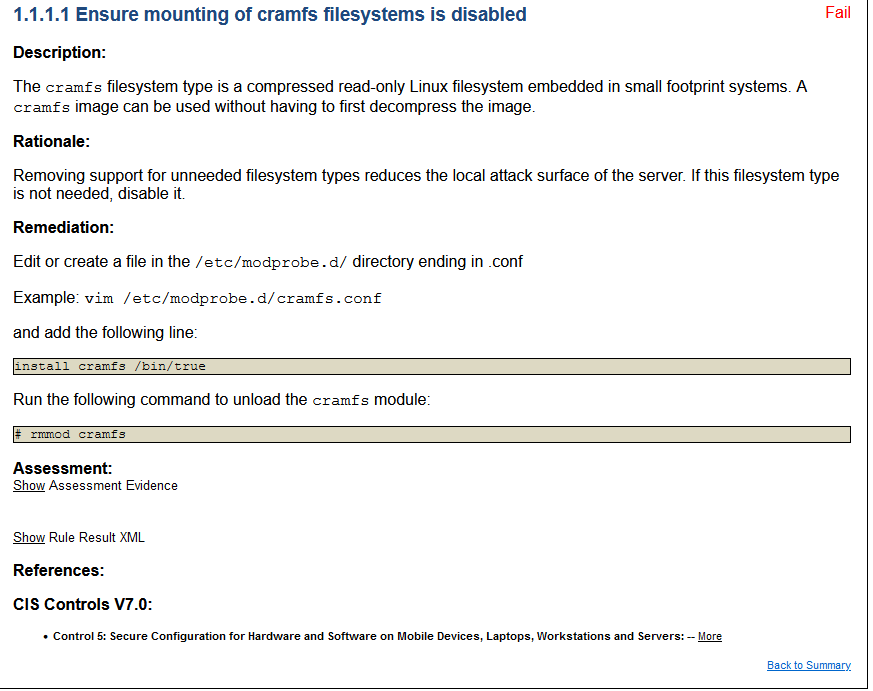
Remediation
So looking at the Drilldown of the results above, we can see that the remediation of the cramfs filesystem is to:
Edit or create a file in the /etc/modprobe.d/ directory ending in .conf and add the following line install cramfs /bin/true
Lets do that now.
sudo nano /etc/modprobe.d/cramfs.conf
and add the line:
install cramfs /bin/true

then run the command
rmmod cramfs

Remediation Scan
For brevity of this post, I’m going to go ahead and rescan this test system and show how I just remediated one finding (1.1.1.1):
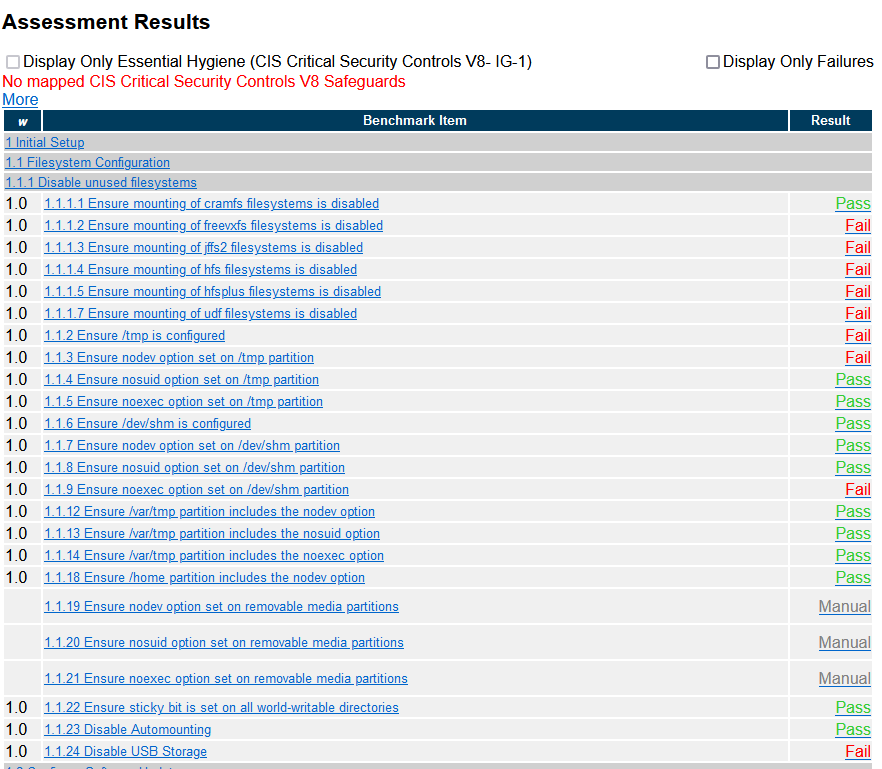
If you look below there are “Manual” results. This indicates results that must be ran/tested manually (i.e. you have to do it by hand to test these controls). While tools such as CIS-CAT, SCC, Nessus, and the likes are great tools, some of the checks can’t be ran due to how the controls are written/handled.
Once you go through all of these items (which really isnt a long time) you will have hardened your OS.
Pro Tips
1 - Set up a “blank” environment and MAKE GOLD IMAGES. What I mean by this is images of Operating Systems that are already benchmarked to CIS, NIST, HIPPA, PCI-DSS or whatever framework you need to utilize for your environment and store/protect these images. You can then deploy these images (even using tools like Terraform) in your environment as “pre-hardened” images.
2 - You can automate the benchmarks (future post). You can take these controls can automate them using a scripting language of your choice. The most common is to use Ansible playbooks, and you can often find these playbooks on GitHub that are peer reviewed and utilized among thousands of other people like you and I. If you aren’t comfortable using other’s codes, take this time to run your own playbooks, and start small. Take an operating system, install it, run the CIS-CAT Tool, and see what has failed out of the box. Set up your script to manage those “failed findings”, run the script, rerun the CIS-CAT tool and check results. You now have a playbook that you can share with others to showcase your work. Test it out on multiple platforms, hypervisors, different desktops, laptops, etc., and see if there are any tweaks that need to be made. Eventually add all of the controls found in that benchmark and you are going to have playbooks/scripts that cover it entirely.
3 - There are other tools out there that remediate 90% of the baseline for you. For example, Ubuntu offers their “pro” service that provides benchmarks for their operating system to apply security baselines to provide most of the baseline for you (if not all). RedHat provides the same. Cloud providers also provide this for you as well. This is good if you are starting fresh, but knowing how to automate the remaining findings can speed up enterprise-wide deployments.
4 - OpenSCAP is another tool (not demonstrated here) that is opensource and can be used to scan your system against security baselines. You can get real fancy and use OpenSCAP with Ansible to deploy the OpenSCAP agent to the hosts and run your baseline scans, report back, and then follow up with Ansible to automate the baseline hardening.
5 - This GitHub Repo is AWESOME and already does 98% of the work mentioned above. It utilizes the OpenSCAP tool and also carries the CIS Benchmarks (as well as others). While you don’t get a lot of the experience of the “DIY” mentioned above you do get a lot more effienciency, plus you can give back by providing feedback for anything you see that needs addressed through using the issues tab.
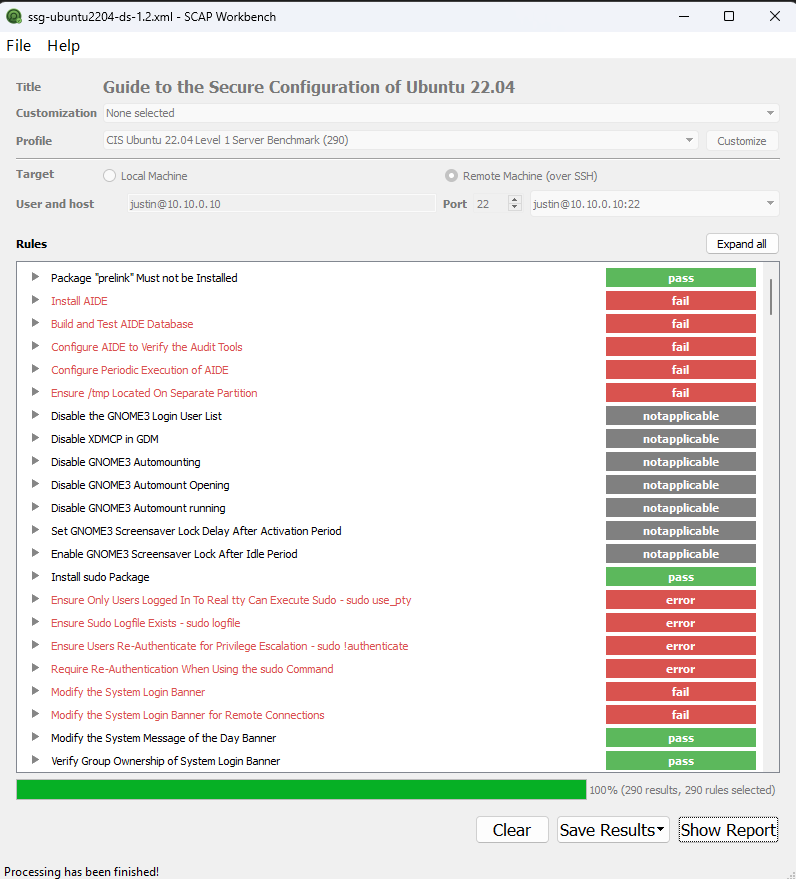
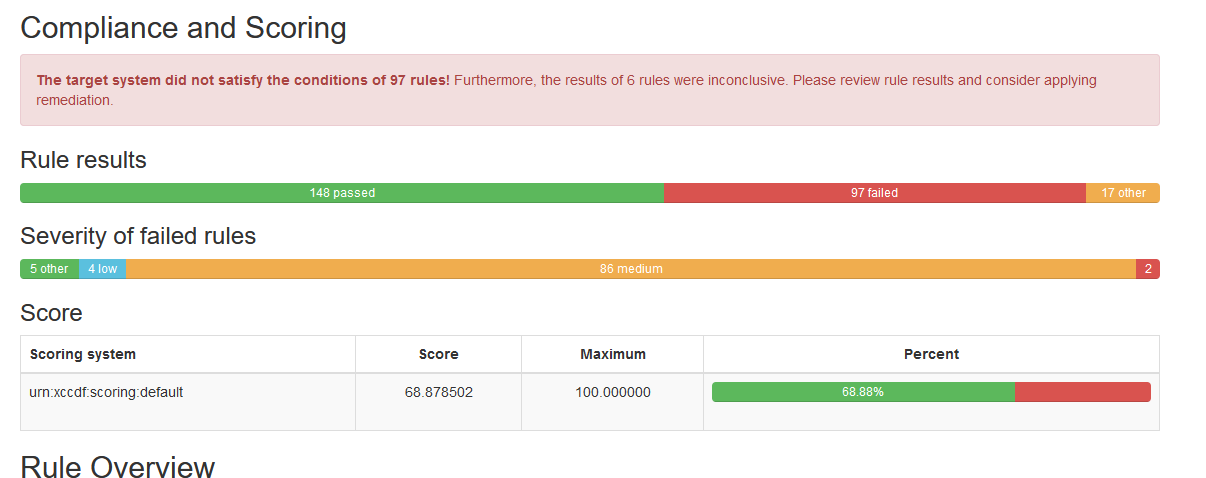
6 - Combining 4 and 5 above, if you want a GUI interface, and use Windows, you can use the OpenSCAP Workbench. From there, you can install the Compliance as Code Repository on a linux OS (by source is best IMO) and visit the “../build” directory you make and find the SSG Data Stream xml files with the corresponding xccdf xml files. These files can be brought over to the Windows OpenSCAP Workbench and used to remotely scan your other boxes (I just did it for Ubuntu 22, when currently (date of this post) there isn’t pre-loaded baseline-checks for Ubuntu 22 in the Workbench application - See photo below:
However, I still much prefer using the Linux Variant…