So for my homelab, I’ve decided today is the day I get to Nuke everything and go to Proxmox, and for good reasons. A) this is a homelab, not a production environment, and B) Proxmox has features I want that ESXi hides behind a paywall. Yes, I know VMUG is only $200 a year and I could use those features, however the one feature I want to utilize that VMUG doesn’t have is ZFS (oh and I can save $200 a year).
While there is no wrong way to set up the hypervisor for your homelab, be it Hyper-V, ESXi, XCP-NG, or just plain Linux with QEMU, I am using Proxmox for a few reasons: Cloud-Init, ZFS Support, LXC (Linux Containers), (free) iSCSI Support (to my TrueNAS box), and I am going to focus on Terraform/Ansible in the future to bring up and tear down Virtual Machines to make them immutable (Virtual Machines are cattle, not pets):
](/assets/img/posts/2022-07-16/2.png)
Also, in the future when I decide I need to expand this project I can also start clustering nodes together (3 Proxmox Nodes), again free of charge, that way when I am updating one node, the remaining VM’s can effortlessly migrate to the next available node.
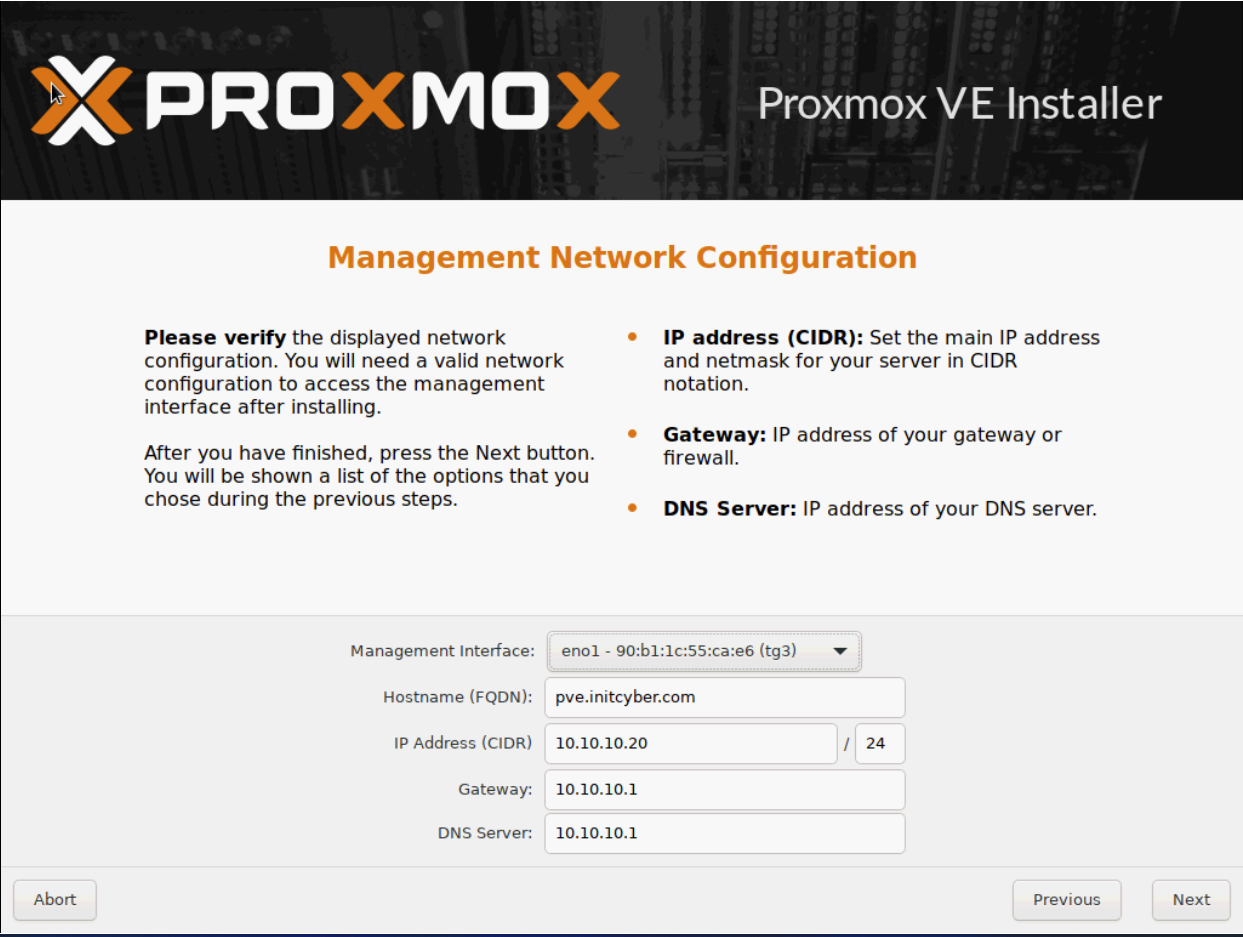
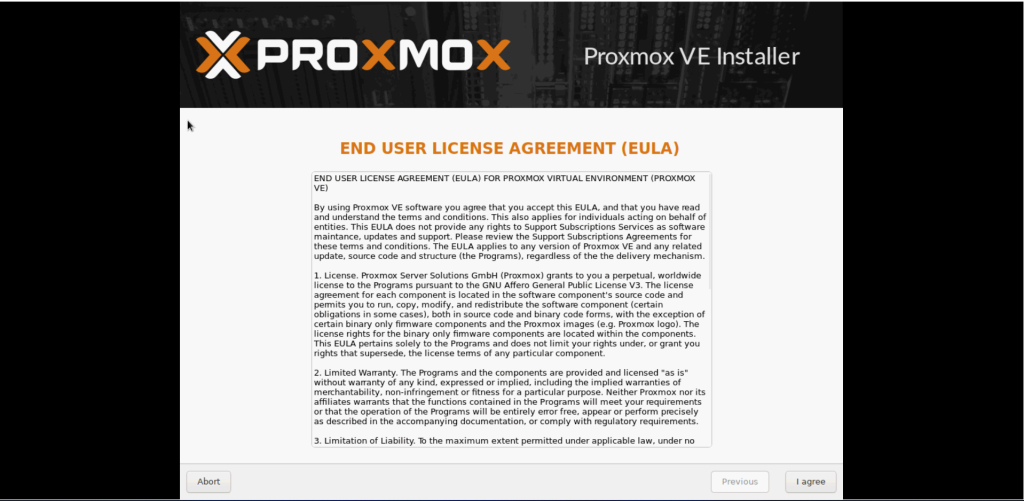
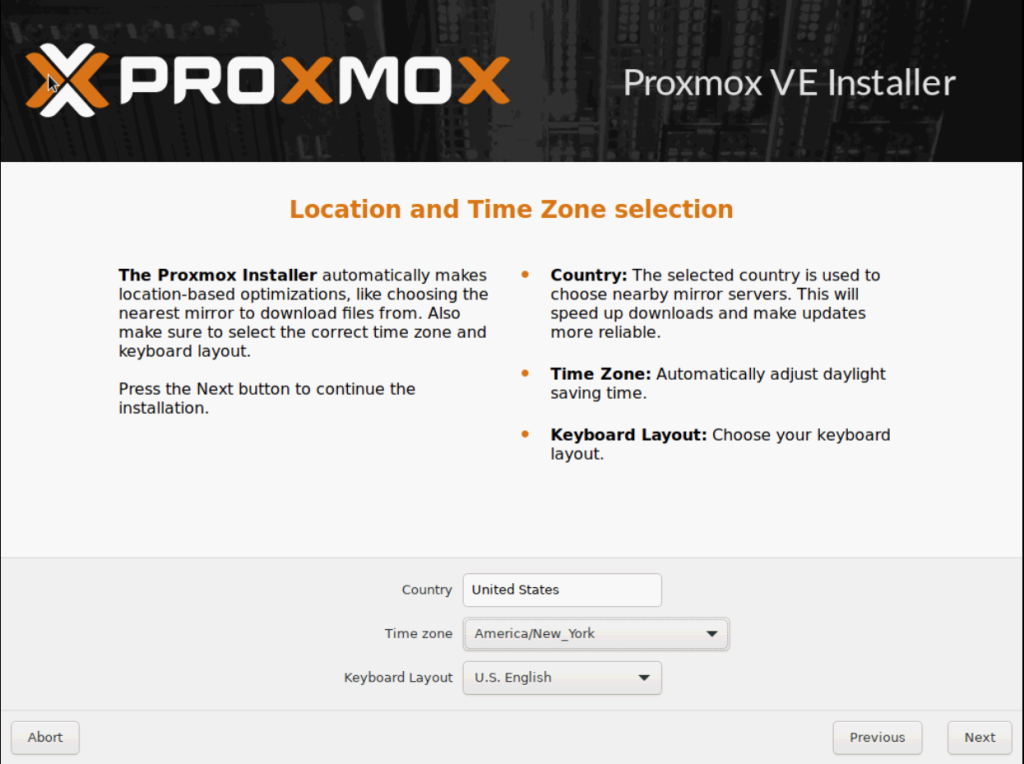
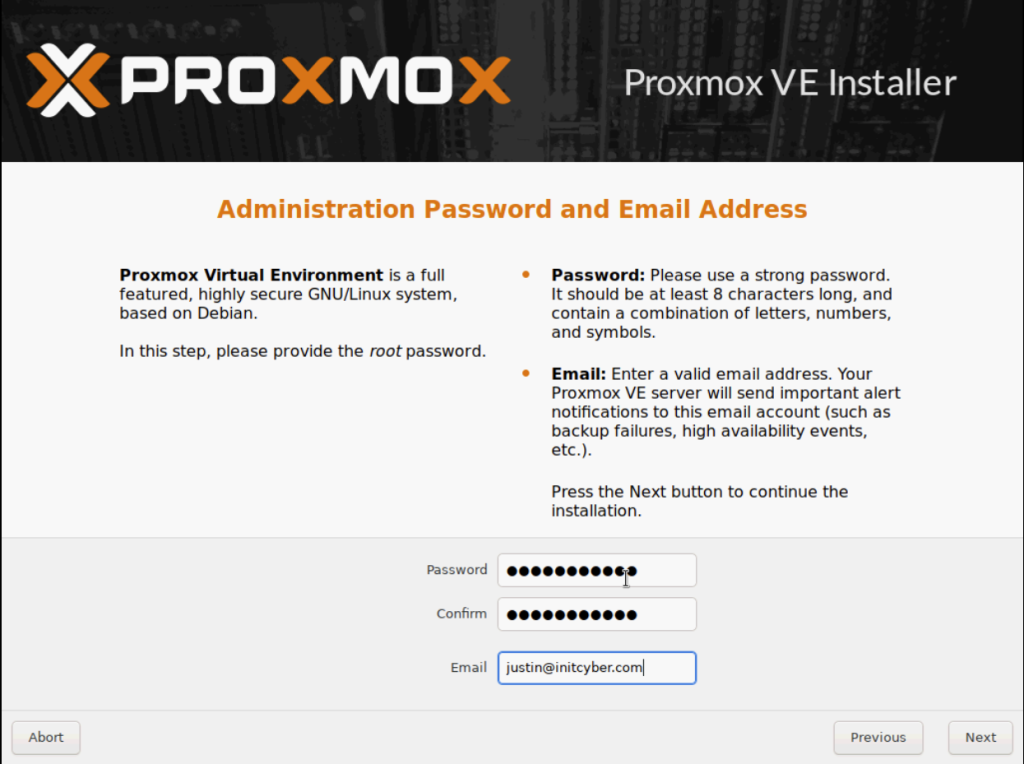
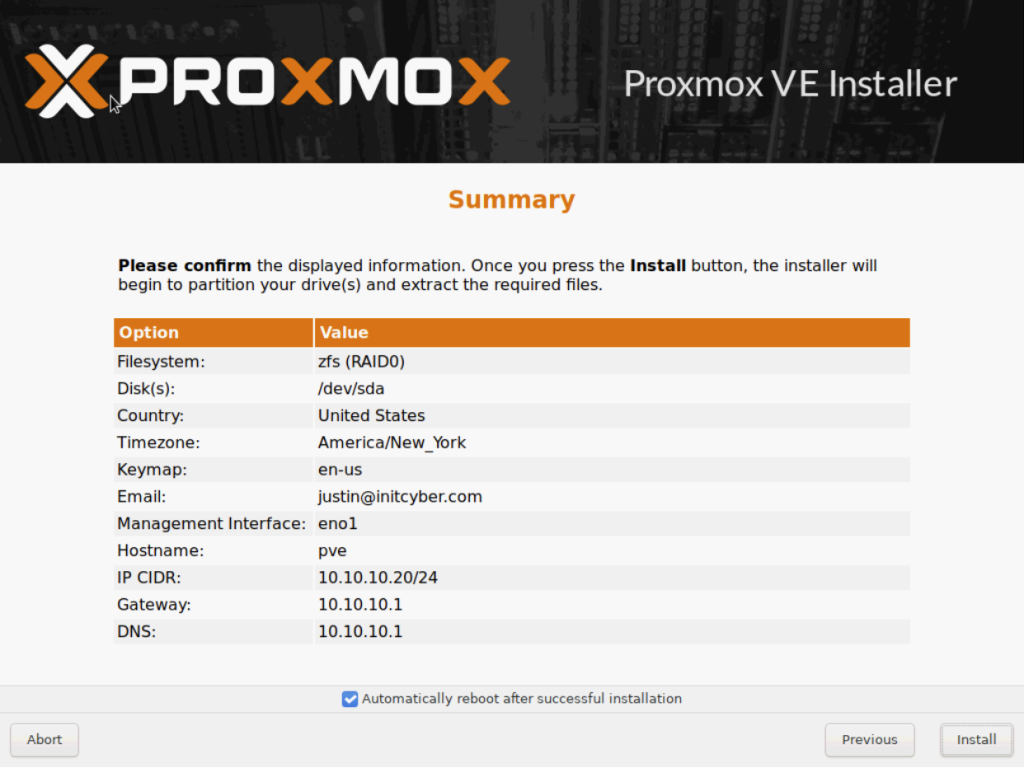
So, today I decided to blow away the ESXi hypervisor and install Proxmox. Installation is pretty straight forward:
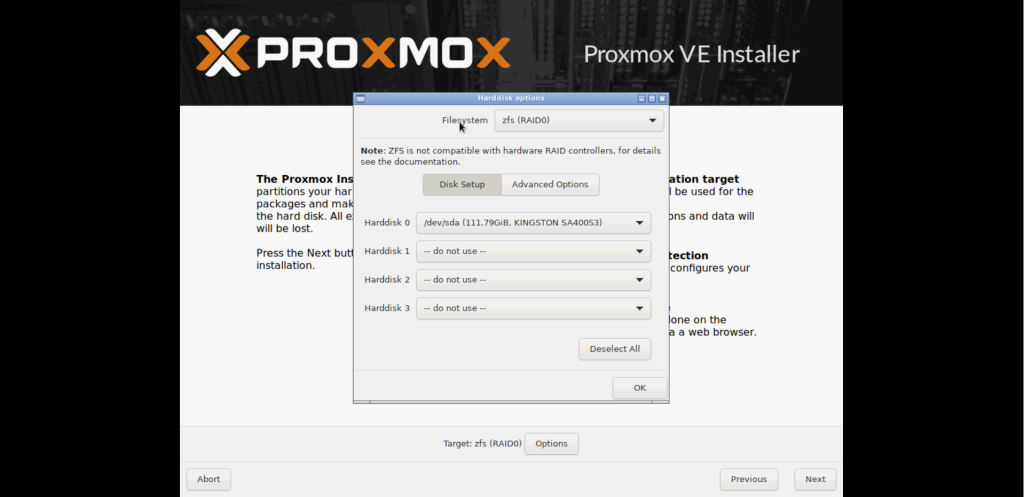

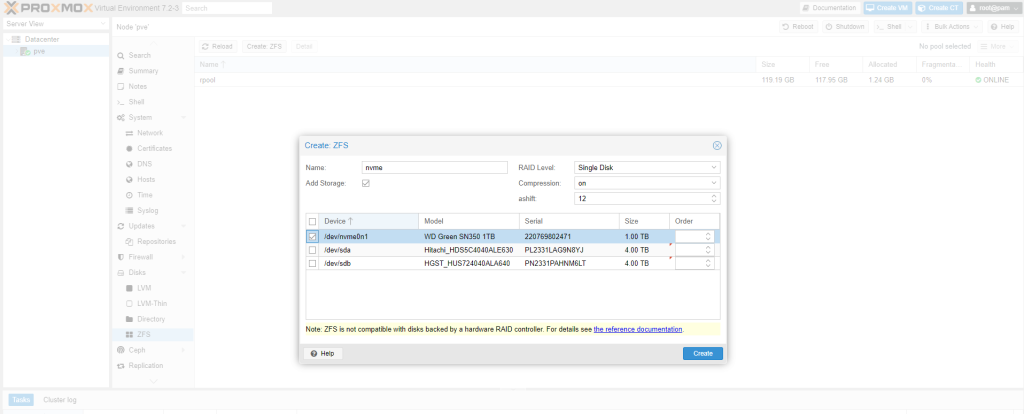
Now its time to set up (at least for me) additional ZFS pools. One for my 1tb SSD and one for the other two 4tb HDD’s, both are going to be ZFS Pools with Striped Vdev (essentially Raid0), only because the data/VM’s stored these A) Don’t matter to me and B) Will be backed up to my NAS/iSCSI share.
Creating the first ZFS Zpool is easy enough, its a single disk on a 1TB NVMe, that can be done via the GUI…
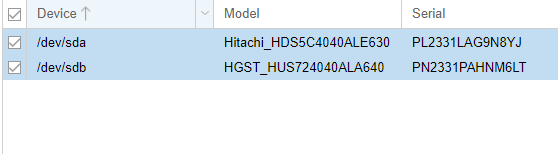
For the other two disks however, I will need to go into the CLI. I know I have two disks, /dev/sda and /dev/sdb, lets add them to a zpool we’ll call “hdd”:
 Breaking down the commands:
zpool – The initial zpool command
create – Creating the pool
-f – Force
-o – Mount Options (ashift=12) – This is for 4k sectors HDD’s, that is the type of drive I am using here. For more you can read up here:
hdd – This is the name of the pool, you can name this however you please
/dev/sda and /dev/sdb – These are the two devices I am adding to the pool
—
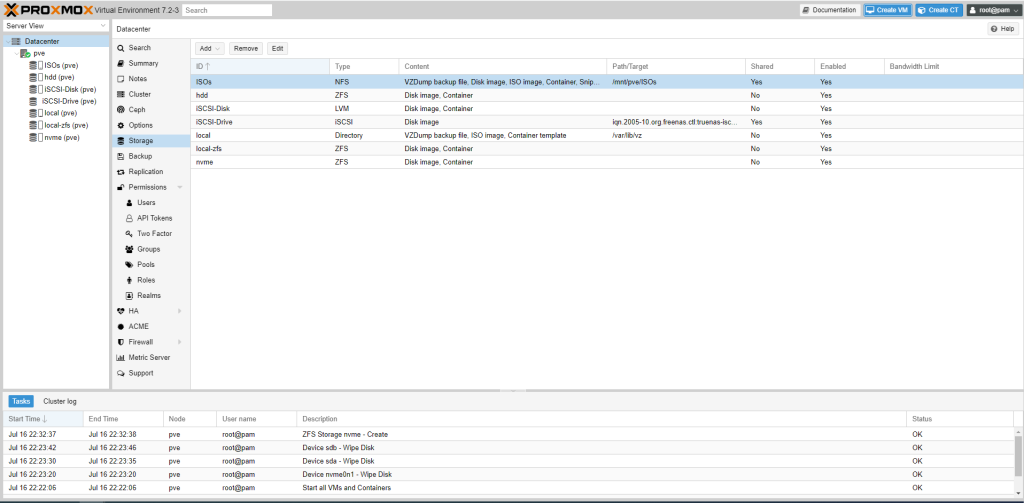
And back to Proxmox GUI – It’s like magic:
Breaking down the commands:
zpool – The initial zpool command
create – Creating the pool
-f – Force
-o – Mount Options (ashift=12) – This is for 4k sectors HDD’s, that is the type of drive I am using here. For more you can read up here:
hdd – This is the name of the pool, you can name this however you please
/dev/sda and /dev/sdb – These are the two devices I am adding to the pool
—
And back to Proxmox GUI – It’s like magic:

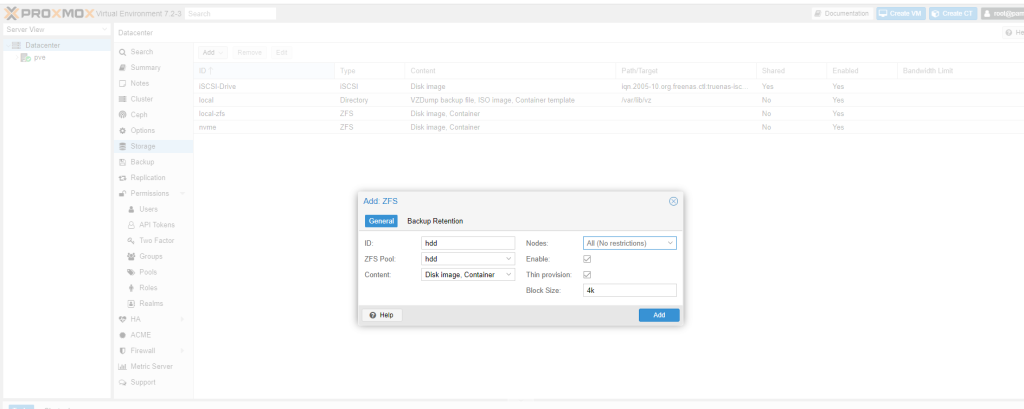
Then we need to click on “Datacenter” on the left then “Storage” to add the ZFS storage so that we can utilize it in Proxmox:
I’ve also set up my iSCSI share from my TrueNAS box (won’t be covered here), but it will hold my VM backup’s as well as the NFS share (same TrueNAS box) that will be used for ISO storage.
Next up on desk, time to start digging into Terraform (more like crash course learning) and utilizing the Infrastructure as Code standpoint coupled with Ansible Configuration Management!