As a note: I am using the evaluation/trial license of VMware/ESXI (upgrading to VMUG later) currently, if you use the Free License for this portion this will NOT work as you need vCenter. ESXI alone lacks some features needed (specifically some API calls that Terraform needs to interact with), as well as some of the cloning/templating features. vCenter also has a backup API that I plan to use for Veeam (not discussed here) which I highly recommend. You can read more here: https://www.vmwareblog.org/esxi-free-buy-esxi-anyway/
Setting up the homelab on paper can be time consuming. Turning around and individually provisioning each server in VMware’s Vcenter interface can take a few more days… However, if you make barebone templates of your virtual machines (both Windows and Linux can be done this way) and set them aside, you can use Terraform to finish provisioning the remaining settings (RAM/CPU/Drives/Network). There are tools like Packer as well that can assist in provisioning these images/templates, but at a smaller scale it’s not need (but well worth learning for cloud infrastructure).
Creating our First Template – Windows Server 2019 Core
Resource: Create a VMware vSphere template for Windows Server 2019
Following the above guide, we are going to create our first virtual machine template for the two Domain Controllers’s, DC01 and DC02. As a best practice, Domain Controllers (and any single purpose configuration virtual machines) should be on Windows Server Core (Source: Secure Domain Controllers Against Attack).
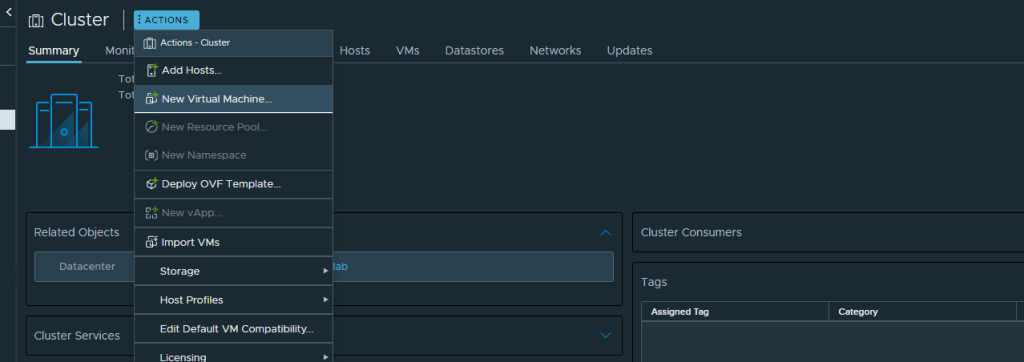
So following the steps, lets deploy our VM:
Omitting some steps above (following the resource above) I am going to store this on my ISO share, it’s shared above all three nodes (Network ISO Share):

Also worth noting, in vCenter 7, (unsure if in vCenter 6.7) a neat feature is this:
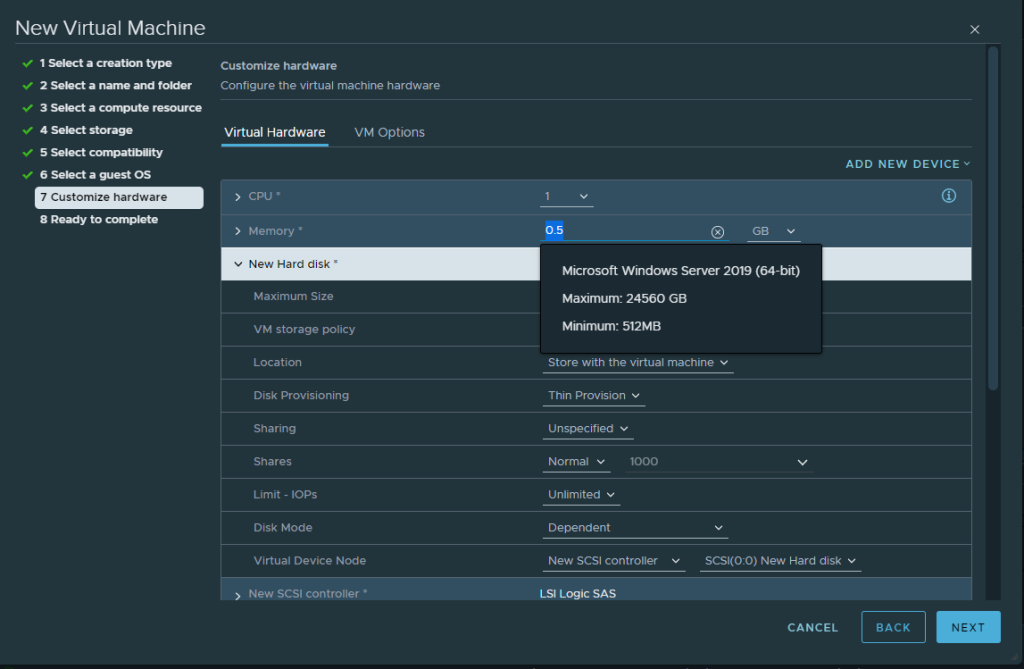
This feature is a quick reference which lets me know how much ram my VM will need to operate. Keep in mind 512 MB of RAM is ONLY for Server CORE. For Desktop Experience you still want 2GB (Server 2k19). You can click to set the minimum requirements here, however you will run into Error Code 0xc0000017 when booting with only 512 MB of ram (it complains about not having enough for a ram disk for booting up). Set your initial install to 1 GB then later back to 512 MB if you really want to slim down your DC’s (I plan on doing this).

NOTE TO SELF: Installing to the NFS ISO Drive (with the ISO on the NFS ISO Drive) while the kids are watching shows on the Plex Server on two TV’s taxes the drives. This… Took… For… Ever… I will most likely set the install location on an SSD and vMotion this bad boy to the ISO once it’s done installing/post install steps as I had to wait nearly two hours to install Windows 2k19 Core Datacenter edition (yes it’s overkill for a DC – I had obtained a cheap license from an .edu discount when I was working for a college though)
Set the new Administrator Password:

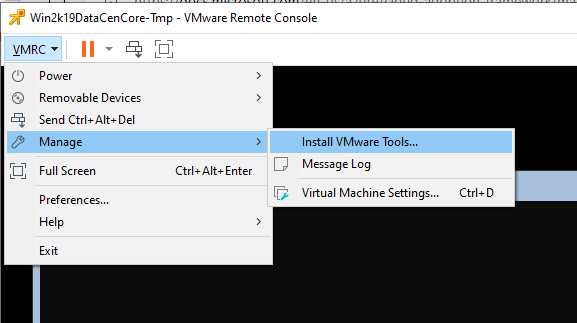
Install VMware Tools:
After you mount, navigate to D: then setup.exe, minimize the command prompt and follow the instructions for a “typical” installation. Then restart.
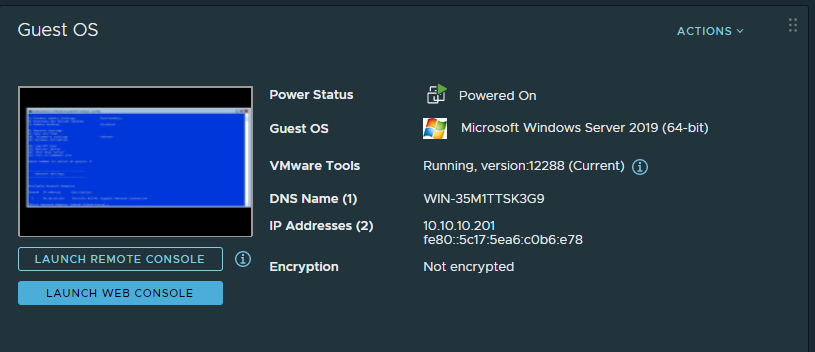
After it restarts, verify that vCenter see’s VMware tools is installed:
I set automatic updates using sconfig (Note, before making a template, I’ll let server core run a day or two to ensure its up to date, especially since it’s running on minimal RAM and on my NFS share)

Set Execution Policy to Bypass in Powershell (First type “Powershell” in the command prompt, then type:
Set-ExecutionPolicy -ExecutionPolicy Bypass
Run the following commands to allow WinRM (or execute the script from here – Referencing the MS Resource above – https://github.com/microsoft/azure_arc/blob/main/azure_arc_servers_jumpstart/vmware/winsrv/terraform/scripts/allow_winrm.ps1
Set-ExecutionPolicy Unrestricted -Scope LocalMachine -Force -ErrorAction Ignore

Remove-Item -Path WSMan:\Localhost\listener\listener* -Recurse


cmd.exe /c winrm quickconfig -q
cmd.exe /c winrm quickconfig '-transport:http'
cmd.exe /c winrm set "winrm/config" '@{MaxTimeoutms="1800000"}'
cmd.exe /c winrm set "winrm/config/winrs" '@{MaxMemoryPerShellMB="1024"}'
cmd.exe /c winrm set "winrm/config/service" '@{AllowUnencrypted="true"}'
cmd.exe /c winrm set "winrm/config/client" '@{AllowUnencrypted="true"}'
cmd.exe /c winrm set "winrm/config/service/auth" '@{Basic="true"}'
cmd.exe /c winrm set "winrm/config/client/auth" '@{Basic="true"}'
cmd.exe /c winrm set "winrm/config/service/auth" '@{CredSSP="true"}'
cmd.exe /c winrm set "winrm/config/listener?Address=*+Transport=HTTP" '@{Port="5985"}'
cmd.exe /c netsh advfirewall firewall set rule group="remote administration" new enable=yes
cmd.exe /c netsh advfirewall firewall add rule name="Open Port 5985" dir=in action=allow protocol=TCP localport=5985
cmd.exe /c net stop winrm
cmd.exe /c sc config winrm start= auto
cmd.exe /c net start winrm
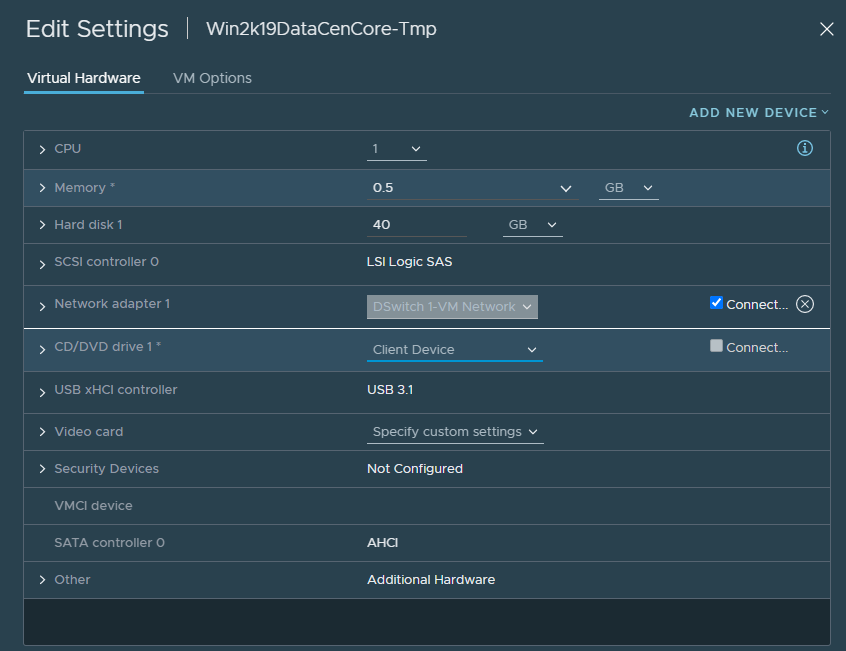
Now it’s time to configure the rest of the virtual machine, set your memory/RAM to the minimum (512 MB for Core, 2GB for Desktop Experience), CPU to 1, and CD/DVD drive to “Client Device” and disconnect it. Then convert it to template.
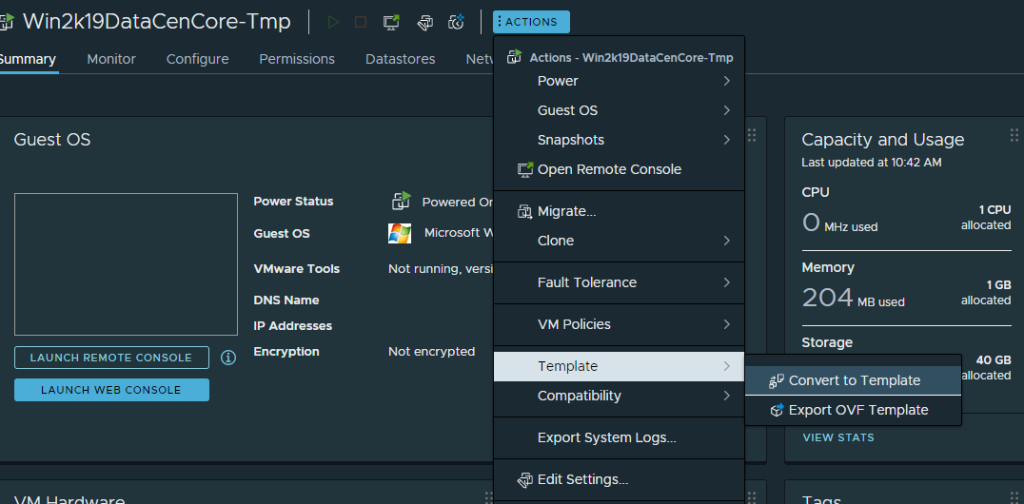
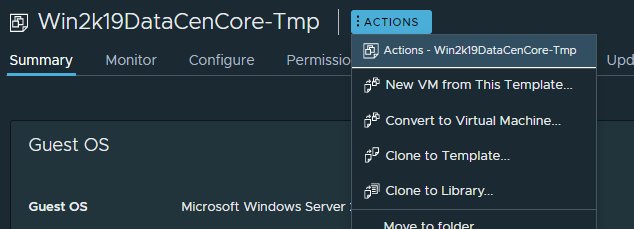
Success! It’s now a template
I will repeat this for Windows Server 2019 Desktop Experience too (This is much simpler for the WinRM step, as I can run the .ps1 script instead of manually running the commands above).
Setting up Linux Based Cloud-Init Images
Setting up Linux Based Templates for VMware is not as simple as our Proxmox server, however it’s still fairly straightforward. In Proxmox, we simply downloaded the pre-compiled Cloud-Init images from their respective distros, provisioned them using tools on the Proxmox Server, then launched them as a template.
For VMware and Terraform, we will need to create this image manually for each VM Template but only once. We could use Packer (for bigger infrastructures) but again this is a Homelab (but it’s never a bad idea to learn it). After you do a clean install, most of the time (specifically Ubuntu 22.04 Live Server) open-vm-tools should automatically download during the install (if you let it install updates/have a network connection. If not, install that package (or similar package) using the package manager of choice or from source.
The following is what we will need to run in Ubuntu to prepare for our VM Template (Adjust accordingly for RHEL/Fedora, OpenSUSE, Arch/Manjaro, Gentoo, Hannah Montana, or whatever other linux distro you use:
$ sudo apt update

$ sudo apt dist-upgrade -y

$ sudo shutdown -h now
Also, in Proxmox it was easier with cloud-init to inject SSH keys after a template was made using Terraform. Prior to creating your template if you want the same SSH key you can inject it now, or you can provision it with Ansible using the password you created above (be sure to edit the sshd config file to allow password login prior to templating the OS), injecting the SSH keys in, then disabling password login after you inject the SSH key. Either way isn’t wrong, but documenting this down is necessary to ensure you know how your servers are provisioned.
Terraform
Setting up Terraform can be done on a separate computer, or directly on one of the nodes, however if it is set up on one of the nodes you have to create the virtual machine first. I’m going to do the latter then “Import” it later into the Terraform code (Chicken and Egg? Egg and Chicken?).
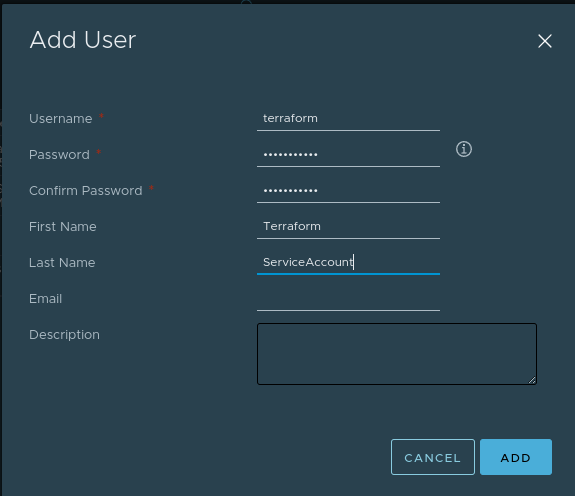
First and foremost, we need to create a Terraform Service Account (In vCenter -> Users and Groups -> Add User:
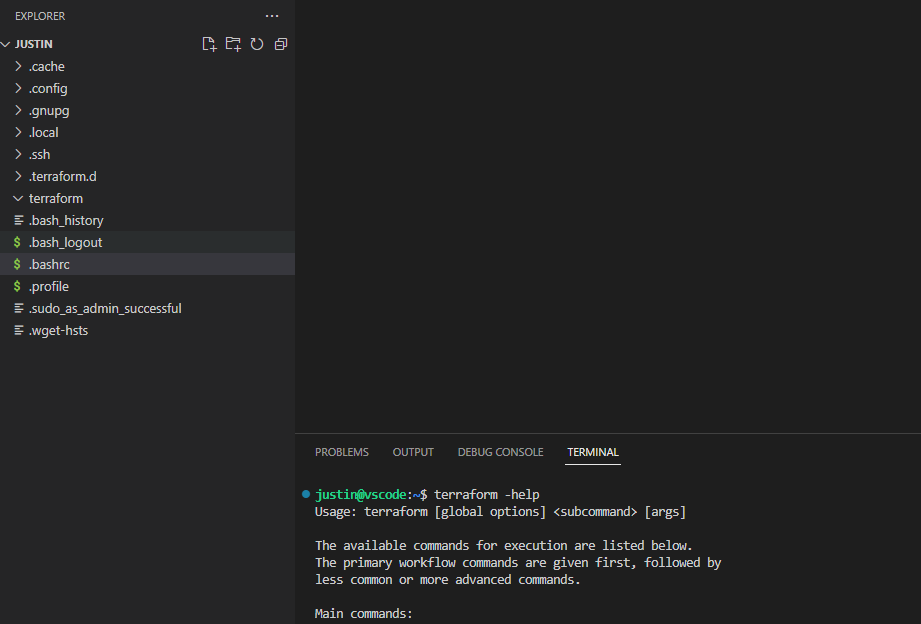
Next, using the Ubuntu Template from above, I’ll deploy a new VM from the template, set up the VS-Code Server, and install Terraform directly on this server. The .tf files on this server will be backed up to a future Git server (for versioning) and further backed up to my NAS and the cloud.
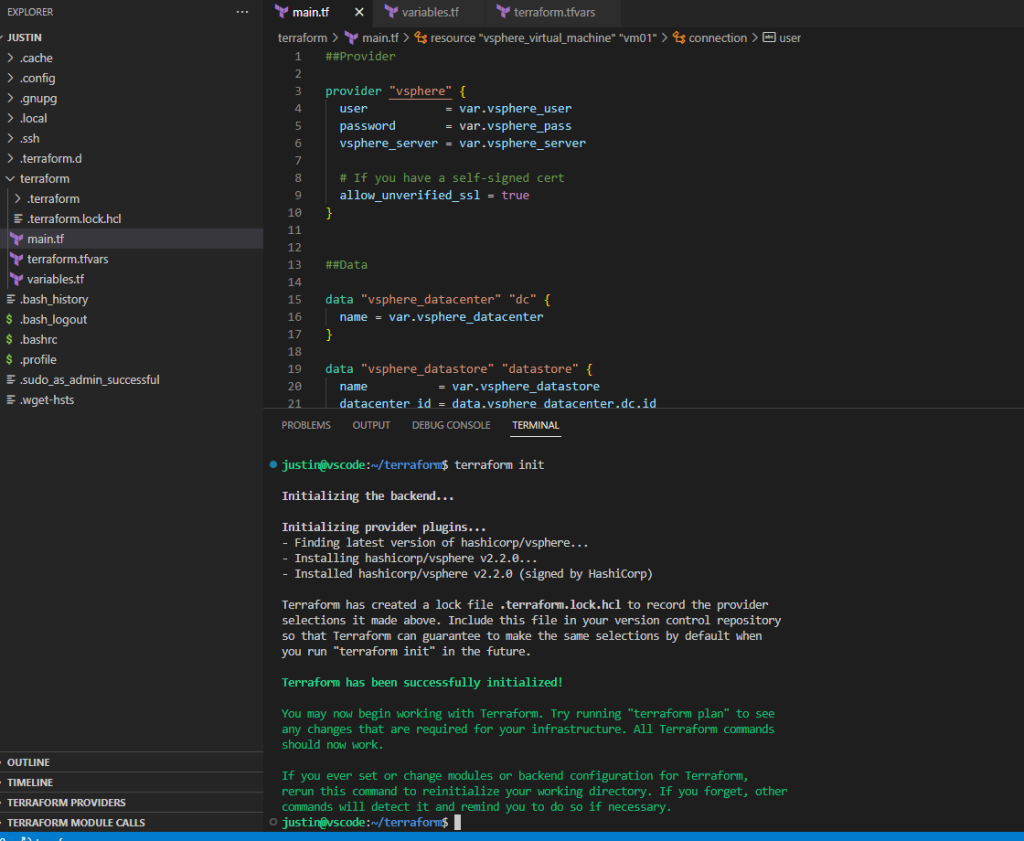
I borrowed a test script from here – https://www.virtualizationhowto.com/2021/05/terraform-vsphere-tutorial-linux-virtual-machine-clone/ and modified the terraform.tfvars to fit my environment, as well as made some minor tweaks:
One note : Terraform is VERY picky on capitalizations:
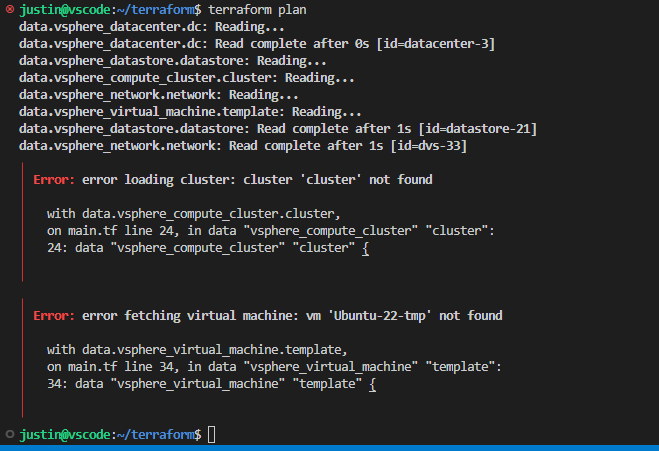
After checking it over again:
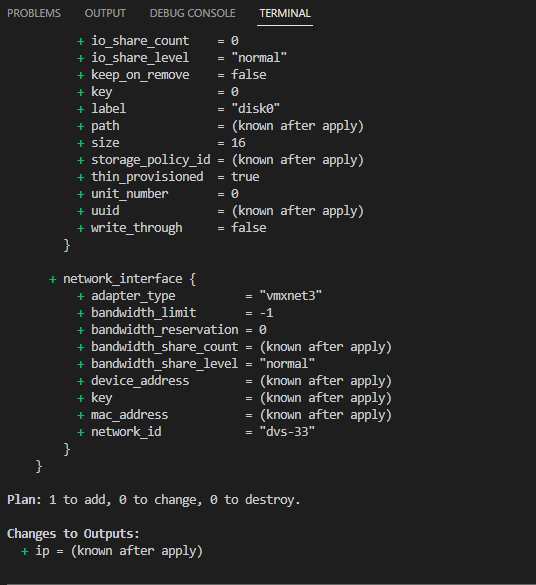
So that tells me that this template will work. From here I’ll plan out the rest of my lab, for now It’s time to start writing out the code….