Preface:
With the big push to Zero Trust, I am a big proponent of literally opening NO advertised ports to my home. You can use Cloudflare tunnels to open up services to your home which is one way (and in my opinion a great way) of self-hosting your services you feel you need to provide to the world, however what about VPN? Most would suggest OpenVPN, which in and of itself is great to use, but that still requires ports to be opened. Wireguard is another solution and is simple enough, but there is an even more simpler solution, one which can also be self hosted Tailscale. It’s one I use and in this blog post I’ll show you how easy it is to set up a mesh-vpn for your network without opening any ports to your home router (cgnat is no longer a problem!) and utilize PiHole to have an always-on ad-blocking experience no matter where you are. (Bonus tip - If you self-host this in the cloud you can have better uptime if you have flaky internet and/or better uptime speeds for PiHole too)

What was I running before?
Before, I was reliant on OpenVPN and opening the usual suspect port (1194). While this in and of itself isn’t necessarily a security concern, I really don’t want any services opened up on my firewall, I want it as locked down as Fort Knox…

Afterwards I was using Wireguard, which was simple to set up and easier to use than OpenVPN, and much faster. I used that for a while and loved it, but shortly after….
Enter Tailscale
I was watching a YouTube video (can’t remember which one, probably Lawrence Systems at the time) and he was touting a new VPN product that just hit the streets called TailScale which uses the Wireguard VPN protocol. Furthermore they use a control plane/central hub that can manage all of my devices and made it easier to set up?
SOLD. I’ll (most) try anything once.
I installed it and set it up, and I was instantly hooked. and since then they have continued to improve the product, which is free for general use and have business plans for their higher tiers. Recently they opened up the ability to have more features (such as more than one subnet (total of Two) routing to enable a true Site to Site VPN). Best of all, pfSense had a package I could utilize to enable my home network to be advertised, and I could install a package on my PiHole to block advertising everywhere and set them as the “Exit Nodes” to route all my traffic through?!
Double Sold.
Headscale
There is an Open Source variant of the TailScale Control Plane called “Headscale” which is a self-hosted control plane variant of Tailscale for those who wish to unlock all the features of Tailscale and not rely on Tailscale. While I haven’t (yet) set this up, it seems rather easy enough to do so, and I plan on implementing it on my home network router/pihole box as an LXC Container.
The team at Tailscale has also saw the work of those working on the Github project for headscale and instead of throwing lawsuits at them like other big companies may have done, they literally made an open statement about it and welcomed it with open arms!!!!
“We’ll continue to support Headscale as a complementary project to Tailscale — with its own community of users and developers. We’ve already enabled Android users to use Tailscale clients with Headscale, and we give the project a heads-up (or a tails-up?) if there are upcoming changes to Tailscale APIs.”
Triple Sold!!!
This all sounds good, how do I do this?
So once you sign up for an account at Tailscales website, lets install our first node (for the record I’ve already done this process on several of my nodes/servers, but for sake of documentation, lets assume that this has never been done). I could very well install the pfSense module for Tailscale and call it a day, let it advertise as an exit-node and subnet router, go into the control plane and accept it, and be done. That would be too easy, and from my testing (and research), I was literally unable to set up PiHole as a DNS blocker when away/disconnected from my network…
First things first - Proxmox Container issues
For Proxmox containers, 99% of the time you are going to be running “Unprivileged containers”, meaning that certain security features from the kernel are utilized for an extra layer of “security”. While you can create and run privileged containers for your PiHole instance, I am a big proponent of not doing this and giving a container “carte blanche” access freely to the underlying hypervisor unless absolutely necessary, especially my DNS/VPN server. For this instance we will use best practices to give the “/dev/tun” device to the pihole container in order to allow it to have the ability to run Tailscale.
SSH into your Proxmox environment
ssh root@IPofProxmox
Then lets mount our /dev/tun device to the LXC Container. In this instance my container ID (found in the Proxmox GUI) is 101. I’ll edit file 101.
nano /etc/pve/lxc/101.conf
(I use nano (fight me, lol), you can use VI, VIM, whatever your choice of editor)
Add the following lines
lxc.cgroup2.devices.allow: c 10:200 rwm
lxc.mount.entry: /dev/net/tun dev/net/tun none bind,create=file
Now restart your container if it is running
PiHole Container
On the PiHole Container I created in this blog post, lets install Tailscale:
(For reference, install guide here)
Add Tailscales Package Signing Key and Repo
curl -fsSL https://pkgs.tailscale.com/stable/ubuntu/jammy.noarmor.gpg | sudo tee /usr/share/keyrings/tailscale-archive-keyring.gpg >/dev/null
curl -fsSL https://pkgs.tailscale.com/stable/ubuntu/jammy.tailscale-keyring.list | sudo tee /etc/apt/sources.list.d/tailscale.list
 then
then
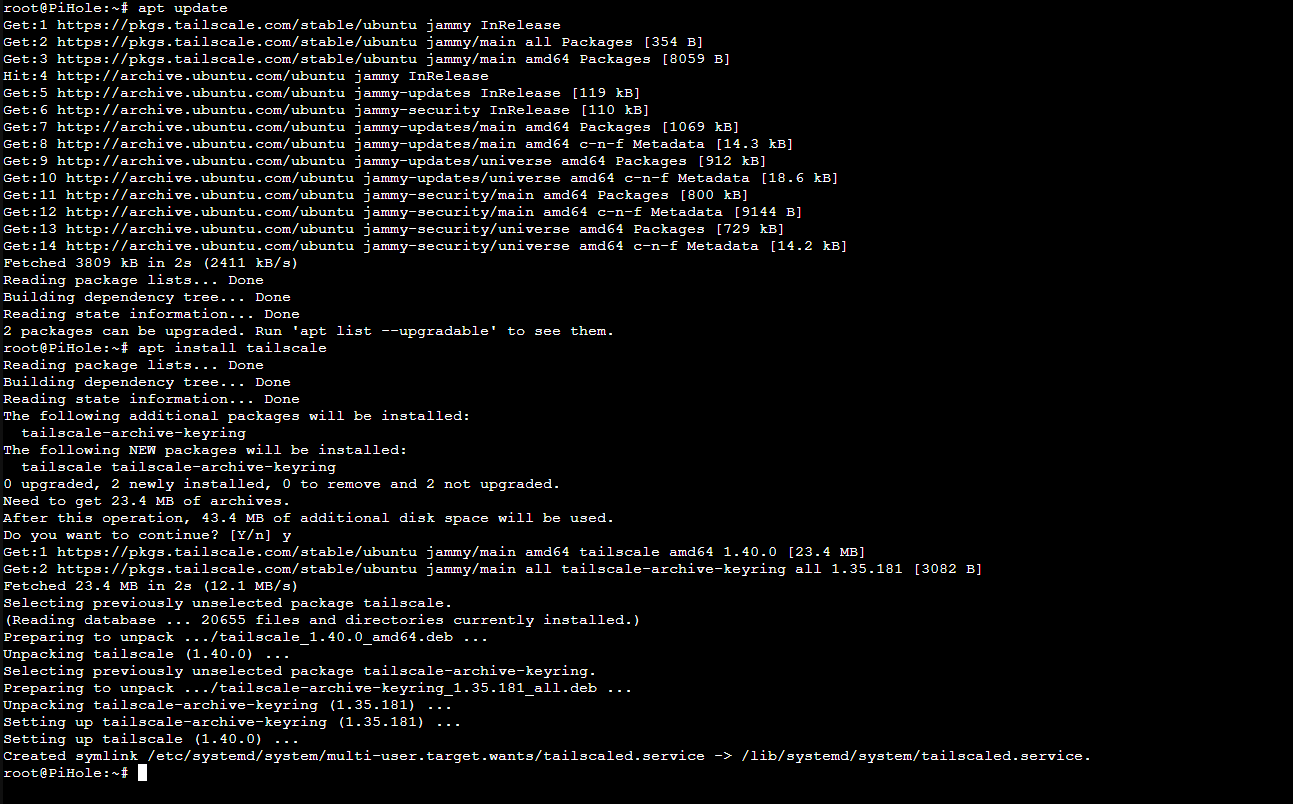
sudo apt update
sudo apt install tailscale
In the install instructions it advises to go ahead and authenticate to your tailscale control plane, which is fine to test things out (and theres no issue with it to test it out for the first time), however I prefer to do things with as little command typing as possible:
First we need to enable some IP Forwarding to advertise as an Exit Node and Subnet Router:
echo 'net.ipv4.ip_forward = 1' | sudo tee -a /etc/sysctl.d/99-tailscale.conf
echo 'net.ipv6.conf.all.forwarding = 1' | sudo tee -a /etc/sysctl.d/99-tailscale.conf
sudo sysctl -p /etc/sysctl.d/99-tailscale.conf

Then lets start Tailscale and advertise our routes/exit node and also flag “accept-dns=false”. This prevents pihole from trying to be its own upstream…
sudo systemctl start tailscaled
sudo tailscale up --advertise-routes=10.0.0.0/24,10.0.1.0/24 --advertise-exit-node --accept-dns=false
PLEASE NOTE: for your IP Addresses after “advertise-routes=”, enter the subnet routes you want Tailscale to “advertise” to the control plane. These are the subnets for your network you want accessible.
Once you “Tailscale up” it will ask you to Authenticate

BONUS TIP: For the Free Version of Tailscale - They included a Subnet Router Failover, so if you have pfSense and Pihole installed in one box like I do, you can go ahead and advertise subnets on both “devices” (the same subnets) and in the event you need to take down the PiHole or it becomes unresponsive you can “failover” to the pfSense subnet and access your network. High Availability is endless here… (Source: Subnet Router Failover])
Tailscale Control Plane
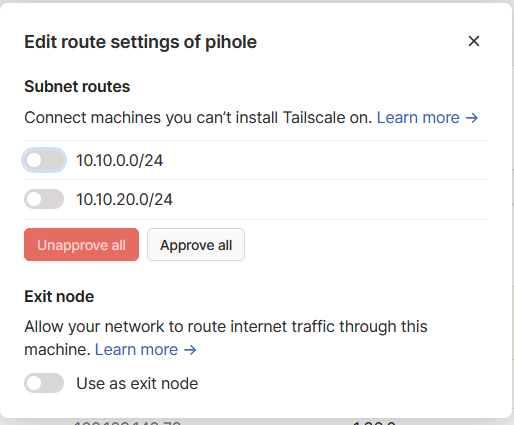
Now lets log into Tailscale and set up our node on the website. First we need to accept the subnet routes and exit node as advertised, on the Machines Tab next to the device you just added, click the three dots and “Edit route settings…”:
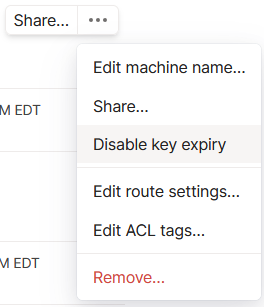
Then disable key expiry. This makes it where we don’t have to reauthenticate Tailscale every so often. I do not recommend this on mobile clients, only clients that are static and not expected to move:
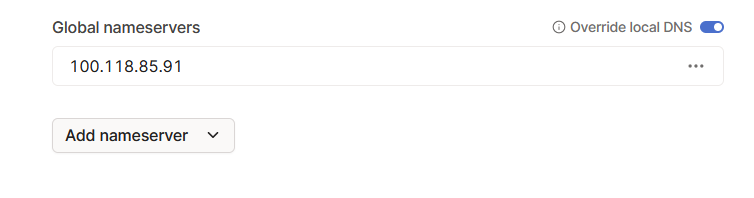
Now set up DNS in Tailscale. Go to your admin console -> DNS and use the “Tailscale IP” of your PiHole server as the DNS server for “Global Nameservers” then check off “Override local DNS”. This forces your clients connected to utilize PiHole for their DNS requests.
Now you have not only a Tailscale Mesh VPN Solution, up and ready to go, but you also have an ad blocker for a “road warrior” set up to block ads anywhere you are.